Install OctaiPipe in Azure Portal#
The following steps help you install OctaiPipe into your Azure Directory using the Azure Portal.
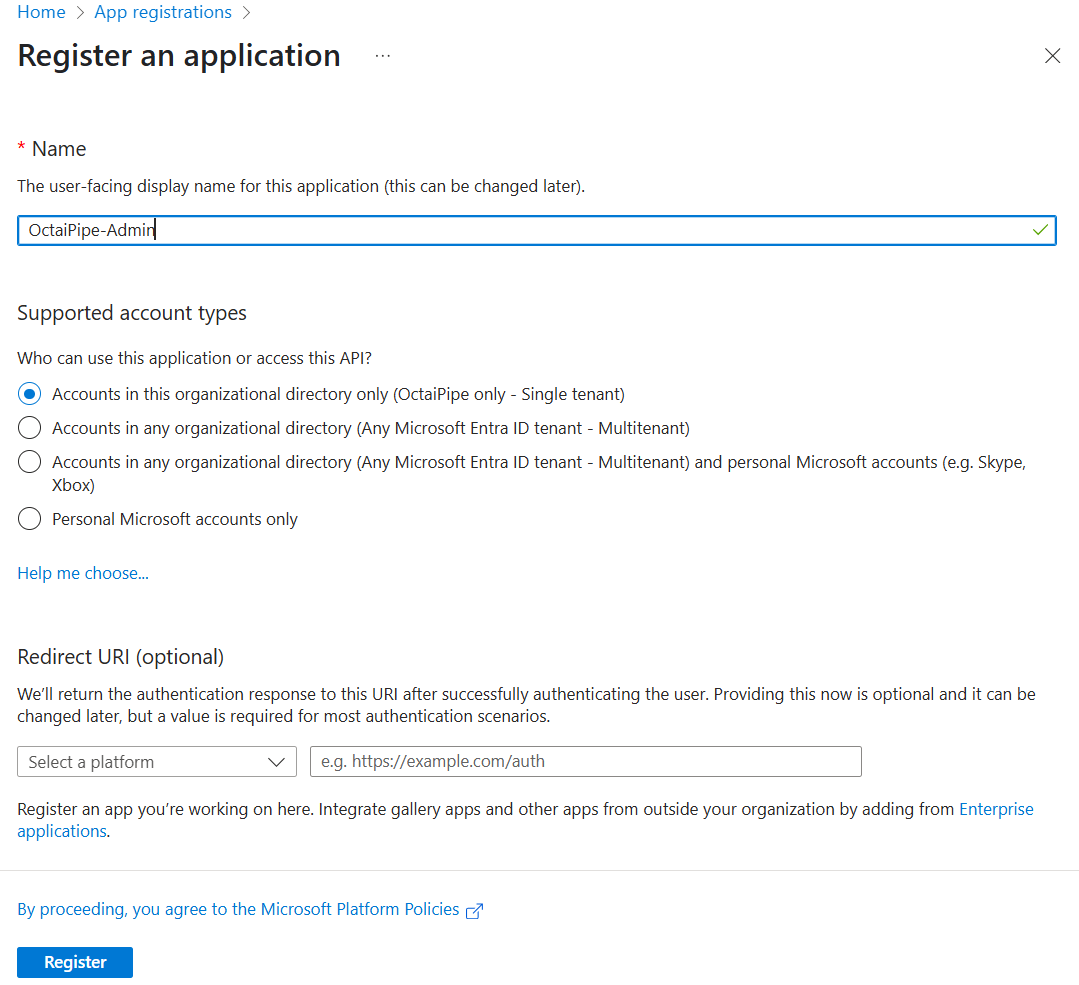
1. Create an App Registration#
NOTE: Azure will sometimes mention App Registration, Service Principal or Enterprise Application. While there is some nuance between these, for the sake of this guide, any mention of either of these refers to the object created in this step.
Navigate to App Registrations in the Azure portal
Click on New registration
Name the App Registration (e.g., OctaiPipe-Admin)
For Supported account types, if unsure we recommend selecting Single Tenant. You can skip setting a Redirect URI.
Click Register and note down the App Registration application ID and object ID.
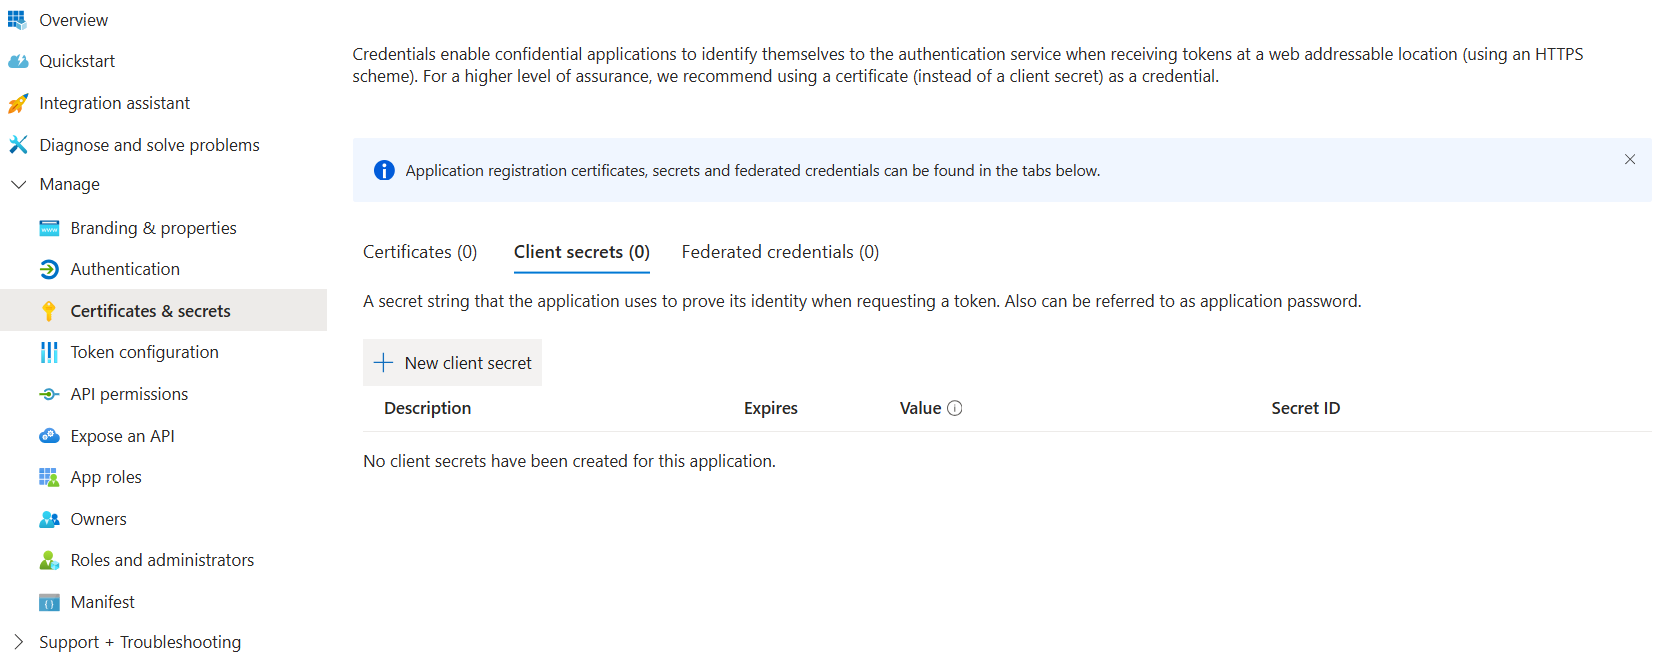
2. Generate Client Secret#
Go to the newly created App Registration
Select Certificates & secrets
Create a new client secret
Note down the client secret value for later
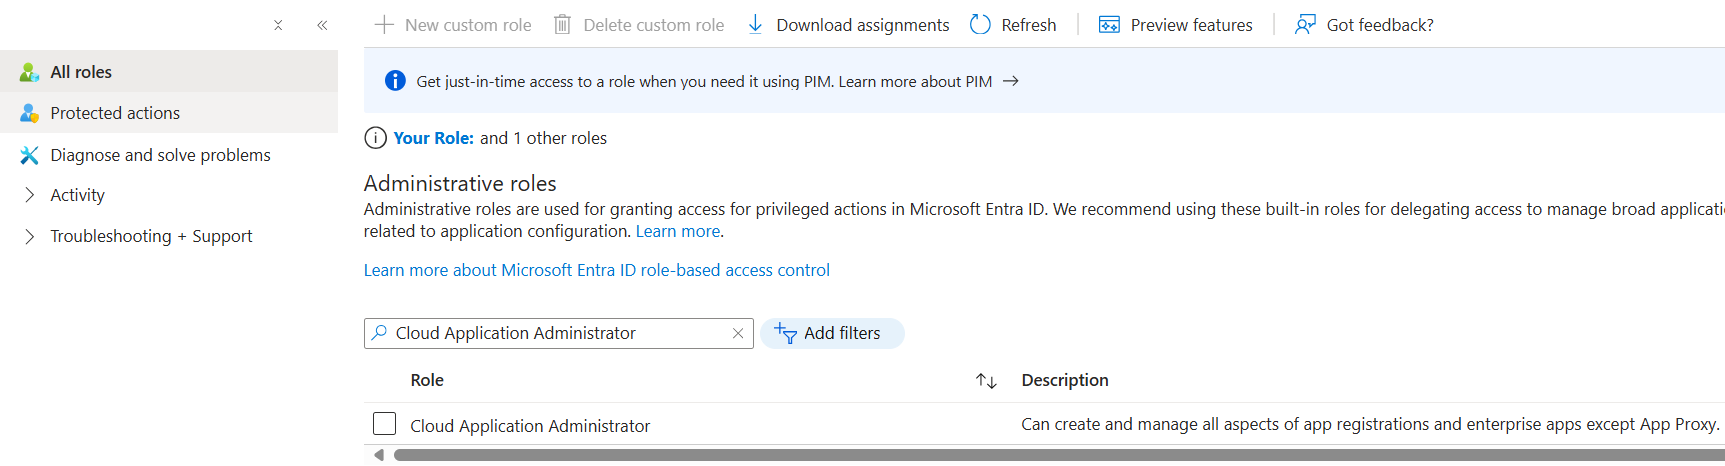
3. Assign Cloud Application Administrator Role#
this requires privileged access; i.e. contact Administrator to do this
Visit Microsoft Entra Id > Roles and Administrators
Select the Cloud Application Administrator role
Click on Add assignment to add the App Registration
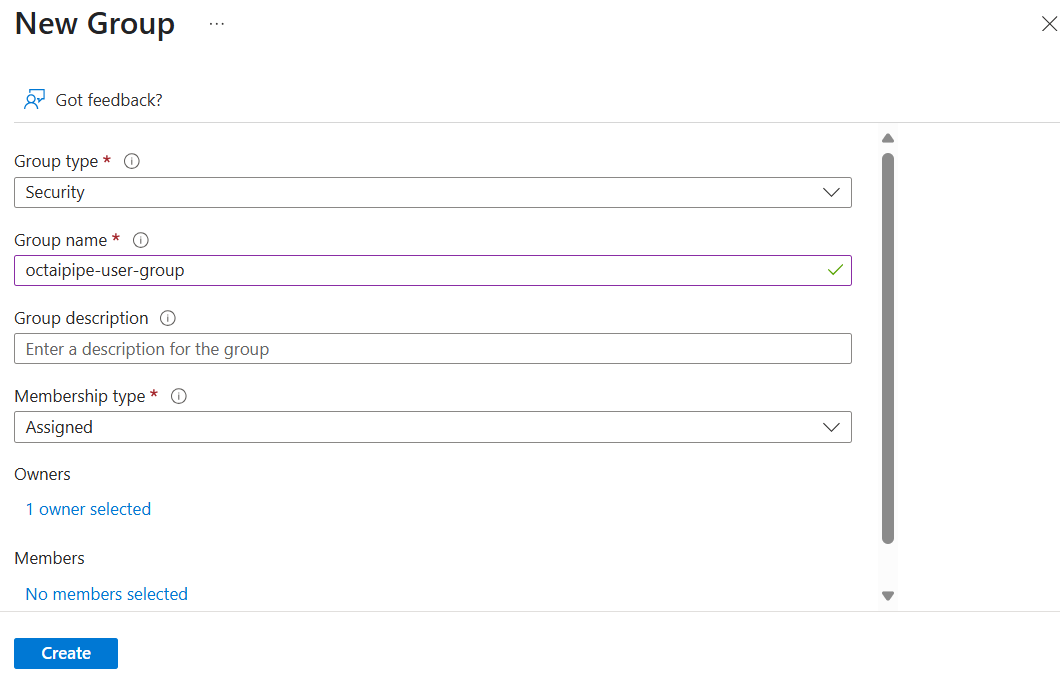
4. Create a User Group#
Navigate back to Microsoft Entra Id > Groups
Create a new group with assigned membership type and Group Type as Security
Set the App Registration as the owner
Add the desired members to the group and note down the Group Id
5. Create a Resource Group#
Create a new resource group in Azure Portal
Note down the resource group name
This is the resource group into which the application will be installed

6. Install Using ARM Templates#
Retrieve the ARM templates necessary to install by contacting your OctaiPipe Technical Success Manager.
Update the following values in the parameters.json file.
customerName: The name of your organisation/installation in lowercase. This will determine the deployment URL of the OctaiPipe Portal, e.g. https://app.mycompany.octaipipe.ai
servicePrincipalAppId: The App ID of the App Registration you created. This will be used during setup to create the necessary resources.
servicePrincipalObjectList: Array with App Registration object ID such as:
["service-principal-object-id"]clientSecret: The client secret generated earlier. This is required to authenticate the Service Principal.
groupId: The Id of the user group created earlier. This will be used to manage access to the application.
octaipipeVersion: The version of OctaiPipe to install. Latest stable version is 3.2.2.
saConnectionString: This should stay as it is.
Steps to run#
In Azure Portal, open up an Azure Shell by clicking the Shell button to the right of the search bar

Set up a bash shell. There is no need for a storage account and you can use the same subscription you are installing into
Log into Azure using
az loginas a user with the owner role in the resource group you created (might need to assign this explicitly)Set the subscription you wish to install into with
az account set -s <MY-SUBSCRIPTION-ID>Upload the files
parameters.jsonandmainTemplate.json

Apply the ARM templates to the resource group you created before by running the full command below:
az deployment group create -g <MY-RESOURCE-GROUP> -f mainTemplate.json -p parameters.json
If the command above fails, you can run it with the --debug flag to get more verbose logging.
For details on this command, check out the the Azure documentation.
You should see resources created in the resource group you created as the command runs.
7. Assign App Role to App Registration#
After running the ARM templates, go back to the App Registration
Go to API permissions then Add a permission
In the pop-out tab, go to My APIs and select the one with the same name and app client ID as your App Registration
Select Task.Read and then Add permissions. This allows the app to act as the user logged into it and inherits the user’s permissions while using the app

Finally, a directory admin will need to Grant Admin Consent for the permission

8. Set up device network rule#
As you connect devices to OctaiPipe, you’ll need to ensure they have access to the relevant
endpoints and on relevant ports. The exact URLs will depend on the customerName field
set up in the deployment above. The following network rules need to be set up:
Rule |
Destination |
Port |
Protocol |
Reason |
Outbound |
app.{customerName}.octaipipe.ai |
443 |
HTTPS |
OctaiPipe REST API |
Outbound |
fl-server.{customerName}.octaipipe.ai |
443 |
HTTPS |
FL server for aggregating FL models |
Outbound |
octaipipe.azurecr.io |
443 |
HTTPS |
Pulling OctaiPipe workload images |
Outbound |
registry-1.docker.io |
443 |
HTTPS |
Pulling edge client images |
Outbound |
auth.docker.io |
443 |
HTTPS |
Authentication service for DockerHub |
You also need to ensure DNS resolution is allowed.
9. Use OctaiPipe#
Congratulations! You have now installed OctaiPipe. You should be able to find the
Portal UI at https://app.{customerName}.octaipipe.ai and the Jupyter developer environment
under https://notebook.{customerName}.octaipipe.ai.