Infrastructure Cost Management#
Cost Optimisation#
Select suitable sizes for your Notebook servers. Start with a small server such as 1 CPU and 2 GB of memory. This should be enough to orchestrate your OctaiPipe workflows. If you find that you need to do more analysis from your jupyter server - slowly increment CPU and RAM from here. Do not exceed a maximum of 1.5 CPU and 5 GB RAM per notebook.
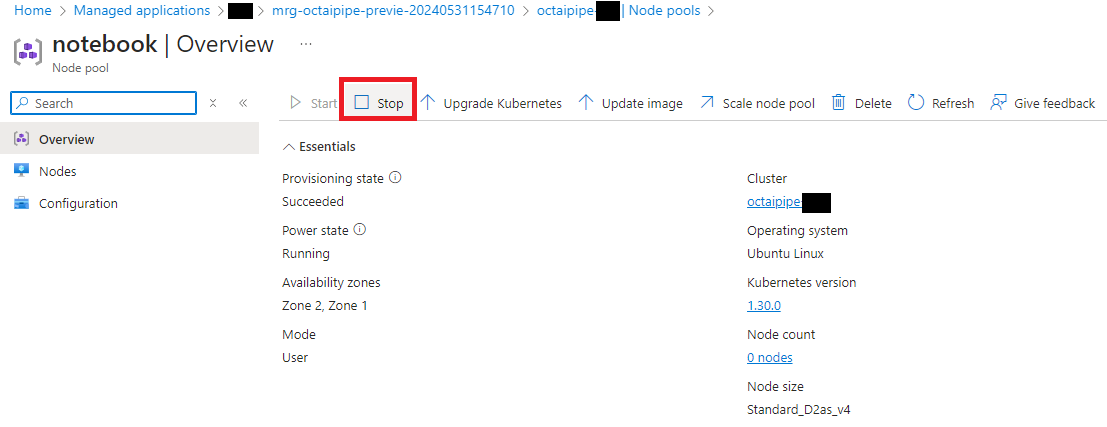
Make sure to stop your Notebook servers when you are not using them. Simply click the ‘stop’ symbol next to the notebook server and turn it on again when resuming work, otherwise underlying k8s node will continue running and consume resources.
Do as much training on devices as you can. Using FL is cost-saving in itself allowing you to avoid running more costly cloud servers.
Azure#
Azure resource management#
Incurred and projected resource costs can be viewed in the Azure portal. To view the costs, follow the steps below:
Navigate to the Azure portal: https://portal.azure.com.
Sign in using your Azure account credentials.
Select your subscription from the subscriptions page.
In the subscription page, you will see a summary of your costs.
Click on “Cost Management” to view more detailed information.
In the Cost Management pane, you can view costs by resource group, service, and other filters.
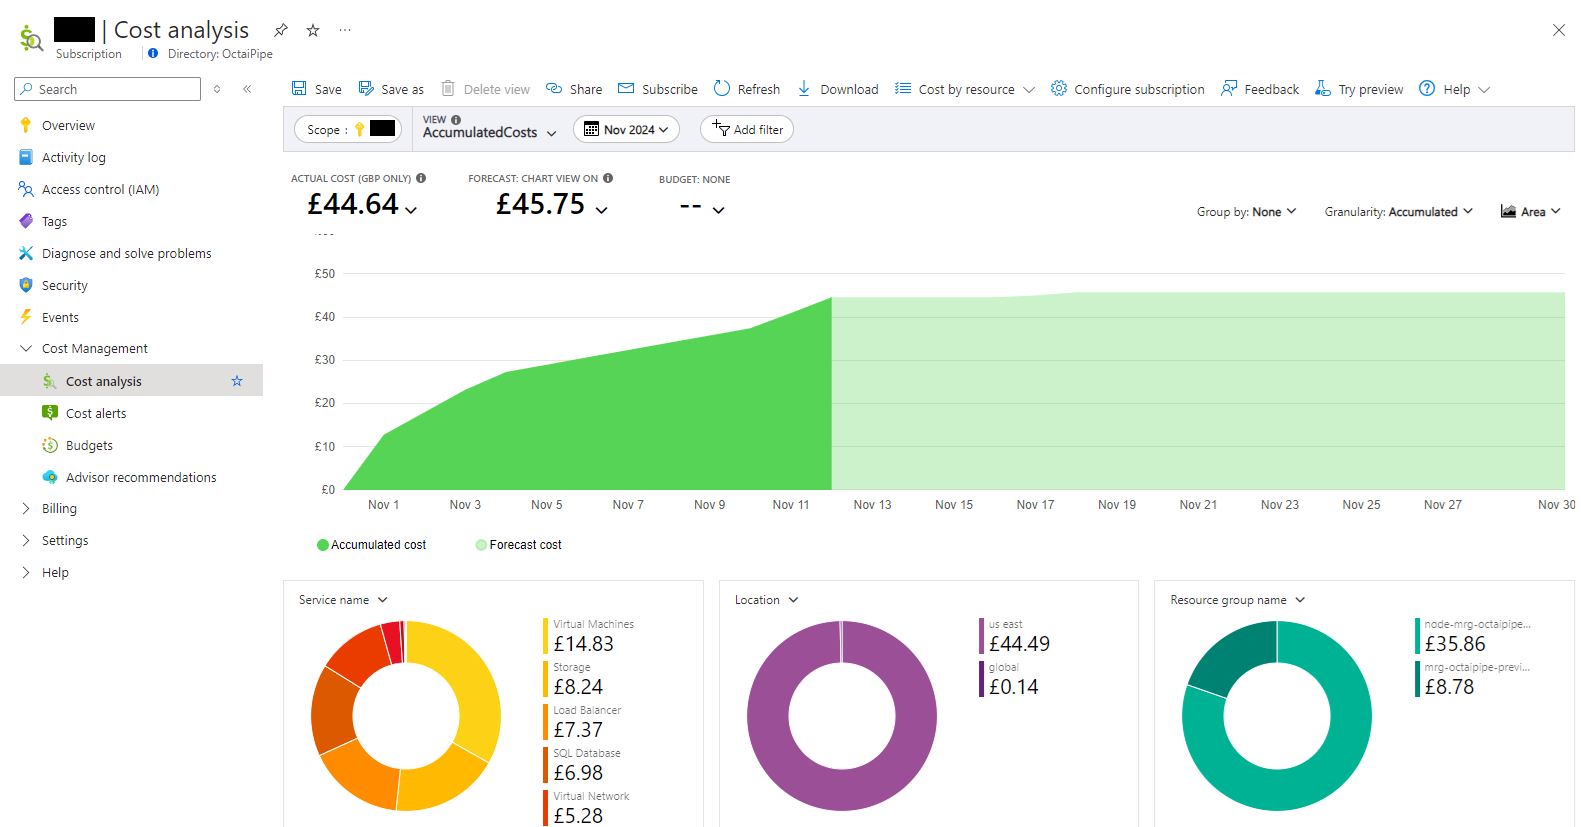
The majority of components comprising the OctaiPipe platform run within an AKS cluster on Azure and this is also where the majority of the infrastructure costs are incurred. The AKS cluster contains 4 nodepools which are used for different purposes:
system: This is where the AKS system pods are run. These are the pods that are required for the AKS cluster to function.
portal: This is where the OctaiPipe portal and API pods are run.
kubeflow: This is where the Kubeflow components for managing the notebooks are run.
notebook: This is where the Jupyter Notebook servers are run.
In order to save costs it is possible to turn off the notebook and kubeflow nodepools when they are not in use. To stop a nodepool, follow the steps below:
Navigate to the Azure portal: https://portal.azure.com
Sign in using your Azure account credentials.
In the main search box at the top, type “Kubernetes services” and select it from the dropdown.
In the Kubernetes services pane, you will see a list of your AKS clusters.
Click on the AKS cluster that you want to manage.
In the AKS cluster pane, click on “Node pools” in the info summary.
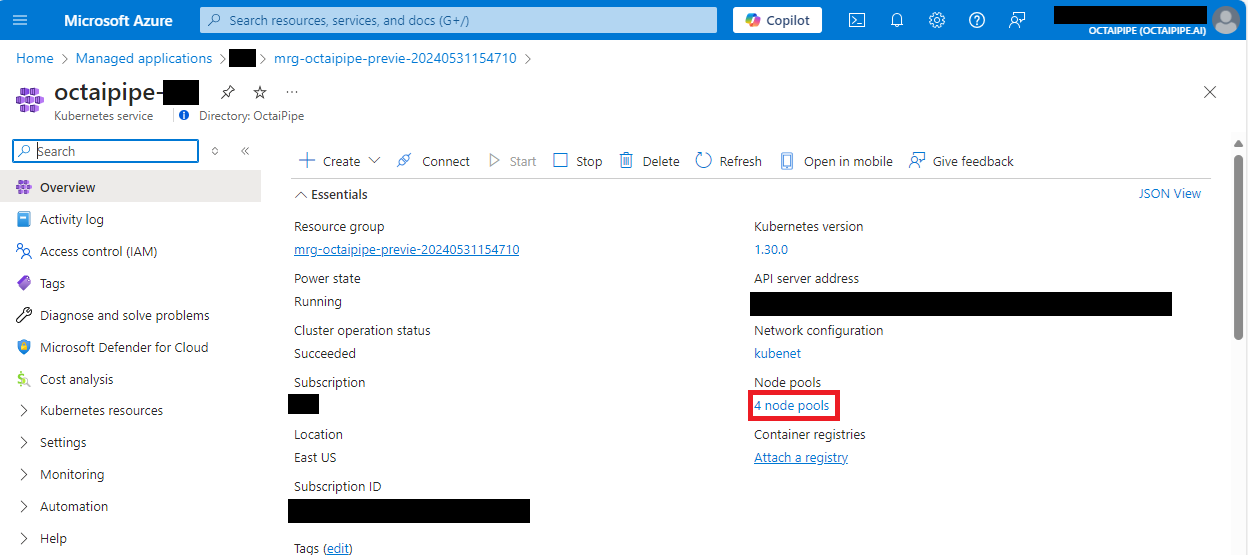
In the Node pools pane, you will see a list of the nodepools.
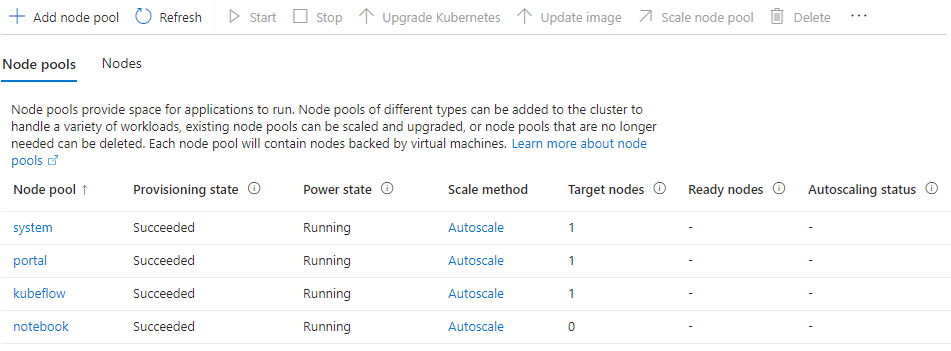
Click on the nodepool that you want to stop.
In the nodepool pane, click on “Stop” in the top menu.
If all notebooks have been stopped in the notebooks management plane then the notebook nodepool should automatically scale down to 0. The kubeflow nodepool can be stopped when there are no active notebooks and the kubeflow components are not being used. This can usually be done when the development interface is no longer needed and the only workloads necessary for OctaiPipe are the Portal and edge devices.
How to clean up Kubernetes resources#
OctaiPipe is designed to not leave hanging deployments and workloads behind, however things might go wrong in an unexpected way, so it’s important to know how you can manually clean up your kubernetes environment. Luckily, it can be achieved with a couple of simple commands.
Note
It’s important to note that the resources that you will see are shared across your organisation so make sure to check in with your colleagues before removing elements you do not recognise.
See what is currently running in k8s
In your jupyter server’s terminal run
kubectl get all -n colab
That should return a list of everything that is currently running. You will notice the list is split into subsections based on resource type: jobs, services, pods, etc. You don’t need to know the details about these terms, but if you would like to know more, you can checkout k8s documentation.
In an ideal situation, apart from intentional workloads there will only be monitoring database server that’s running, which will look something like this:
NAME                                                             READY   STATUS             RESTARTS   AGE
pod/monitor-database-demo24dev-production-image-688d7b65bf-tq8w2   1/1     Running            0          32h

NAME                                                  TYPE           CLUSTER-IP      EXTERNAL-IP     PORT(S)          AGE
service/monitor-database-demo24dev-production-service   LoadBalancer   X.X.X.X         X.X.X.X         8086:30080/TCP   2d9h

NAME                                                        READY   UP-TO-DATE   AVAILABLE   AGE
deployment.apps/monitor-database-demo24dev-production-image   1/1     1            1           2d9h
Other resources that you might see there are FL servers, monitoring observers and triggers and cloud deployments. If you are sure there are resources that shouldn’t be there, go to step 2.
2. Delete the resources You can copy the resource name from the terminal and run the following command to delete it:
kubectl delete -n colab <resource name>
For example:
kubectl delete -n colab pod/ct-4869f-policy1-trigger-cloud-28557830-h54n4
Note
There is an order for deleting resources:
deployments
cronjobs
pods
services
If you don’t follow the order, some of the resources might be recreated after you delete them.
And in case there are several resources, you can just queue them at the end of the command separated by space.
kubectl delete -n colab <resource 1> <resource 2> <resource 3>
3. Delete unattached volumes A specific resource type that that is not shown by kubectl get all -n colab are volumes (pvc’s). To see the list of the volumes, run
kubectl get pvc -n colab
You should see the result like below
NAME                                       STATUS   VOLUME                                     CAPACITY   ACCESS MODES   STORAGECLASS   AGE
monitor-database-demo24dev-production-data   Bound    pvc-cd4901d1-4724-4312-a2c8-6906a76043ac   5Gi        RWO            default        2d18h
test-influxdb-db-data                      Bound    pvc-c037c4f1-9d05-4c19-a625-b1779d8a97d0   5Gi        RWO            default        2d18h
In the example above both volumes are Bound, that means they are attached to other running resources and should be left as they are. For those volumes that are not bound, delete them via this command:
kubectl delete pvc -n colab <volume name>
Let us know if you have any issues
If you experience a recurring issues of dangling workloads or issues with deleting accidental resources, don’t hesitate to contact us at support@octaipipe.ai
How to remove unattached disks#
In order to manage costs, it is important to remove any unattached disks from your Azure account. Disks can be created when a new Jupyter Notebook is spun up in OctaiPipe and are not automatically deleted when the instance is deleted.
Login to Azure Portal - Navigate to the Azure Portal: https://portal.azure.com <https://portal.azure.com> - Sign in using your Azure account credentials.
Navigate to Disks - In the main search box at the top, type “Disks” and select it from the dropdown.
Filter Unattached Disks - In the Disks pane, you will see a list of all the disks. - From the filter options, select “Disk state” and choose “Unattached.”
Delete - Click into each disk and select “Delete” from the top menu.
Precautions - Ensure that there’s no valuable data on the disk that might be required in the future. - It’s recommended to have backups or snapshots of disks before deletion. - The disks attached to your Jupyter Notebook Servers will come up as unattached disks if the Notebook server is Stopped. Make sure to not delete the Notebook server disks as it will mean the Notebook server cannot restart and your data will be lost.
Receiving Alerts for long-running Notebooks#
Sometimes you might forget to stop your Notebook servers when you are not using them. To help you manage costs, you can set up alerts in Azure to notify you when a Notebook server has been running for a long time. The following steps will guide you through how to set up such alerts.
1. Enable container insights for your AKS cluster#
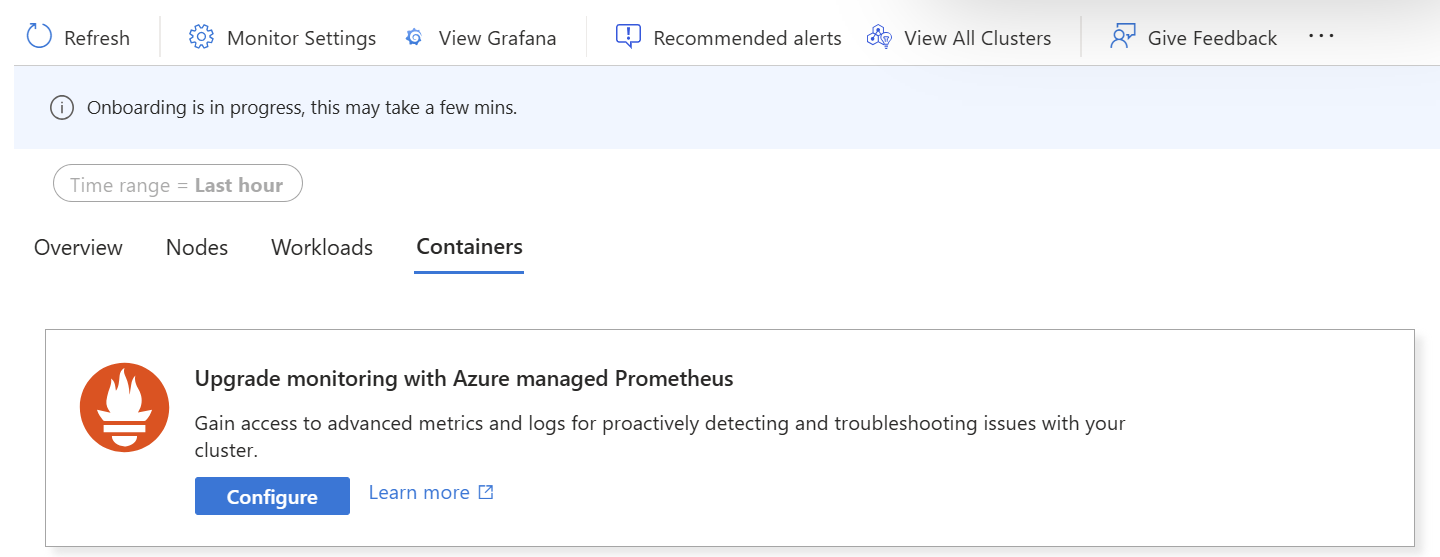
To set up alerts, you need to enable monitoring on your AKS cluster. This can be done by following the instructions in the Azure documentation.
In short, go to the cluster then Monitor > Container > Configure and then make sure Prometheus is enabled.
2. Create a Log Alert#
Once monitoring is enabled, you can create a log alert to notify you when a user has long-running pods, which indicates that a Notebook server has been running for a long time.
Go to Alerts > Create > Log Alert and set it up with Custom Log Search.
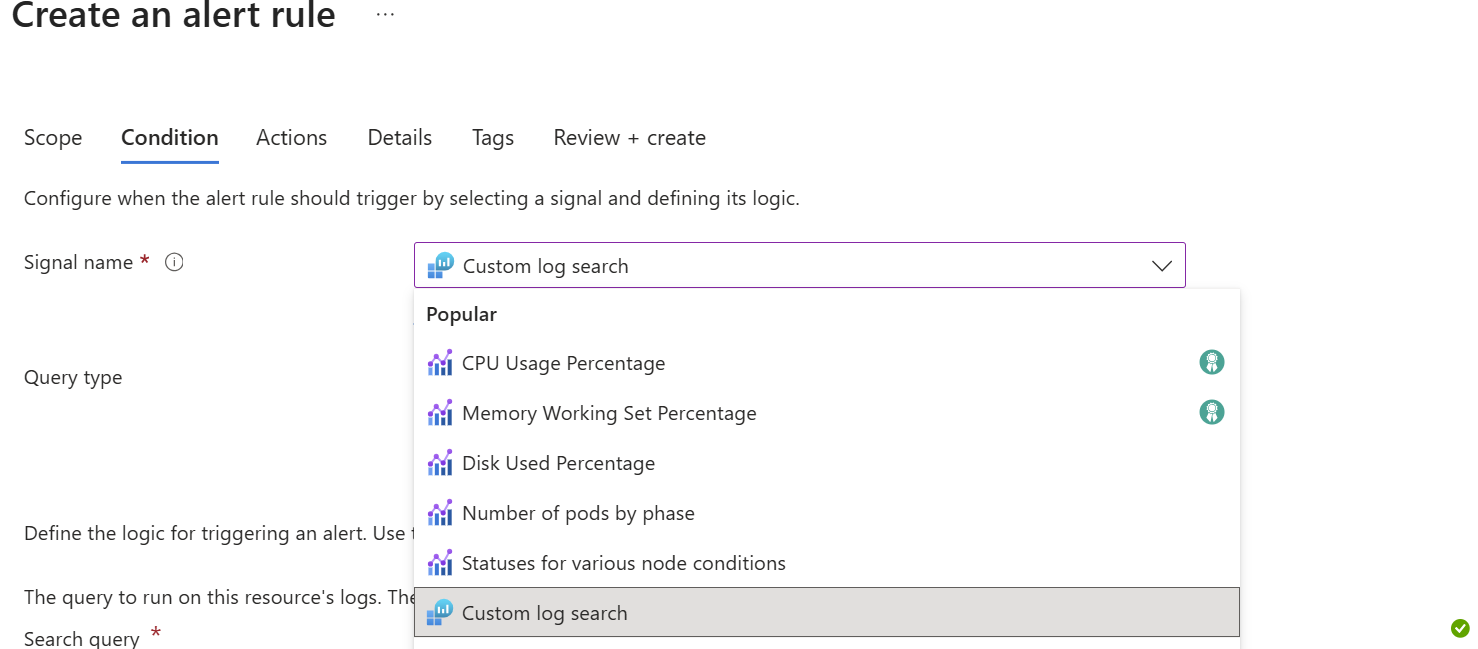
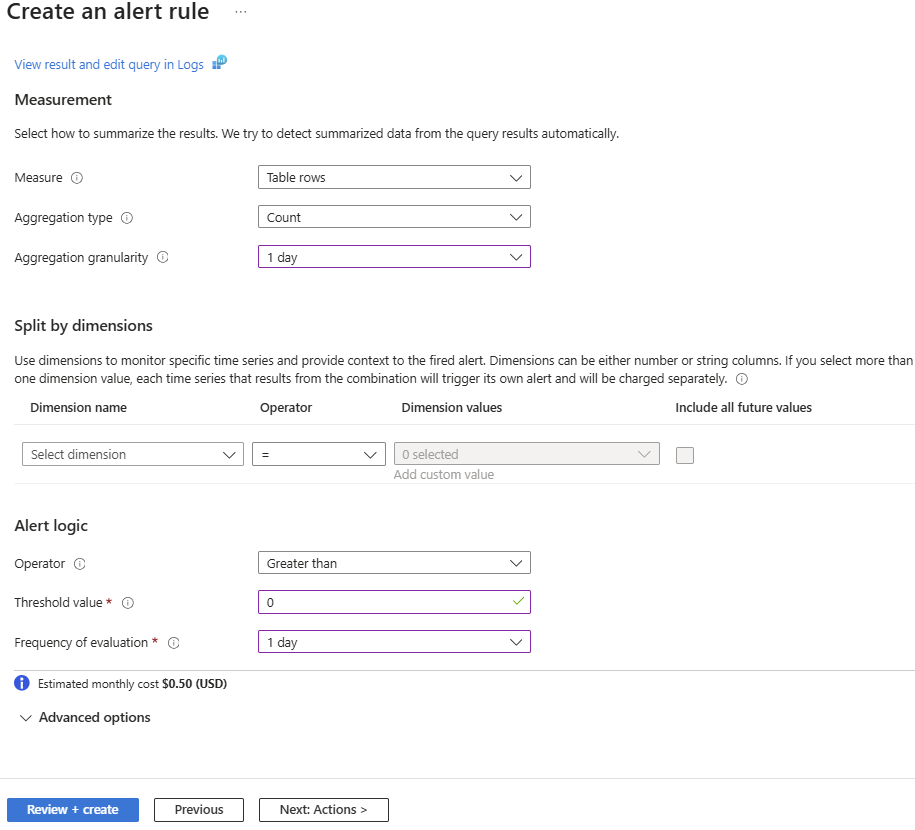
Add a query similar to the one below, where you specify your cluster and the namespace of the user you want to check pods for.
In the example below, we send an alert when a pod has been running for more than 5 days, however, you can adjust this to your needs.
KubePodInventory
| where ClusterName == "my-cluster"
| where Namespace == "firstname-lastname"
| where isnotempty(TimeGenerated)
| extend UptimeDays = datetime_diff('day', now(), TimeGenerated)
| where UptimeDays > 5
| project Name, Namespace, TimeGenerated, UptimeDays
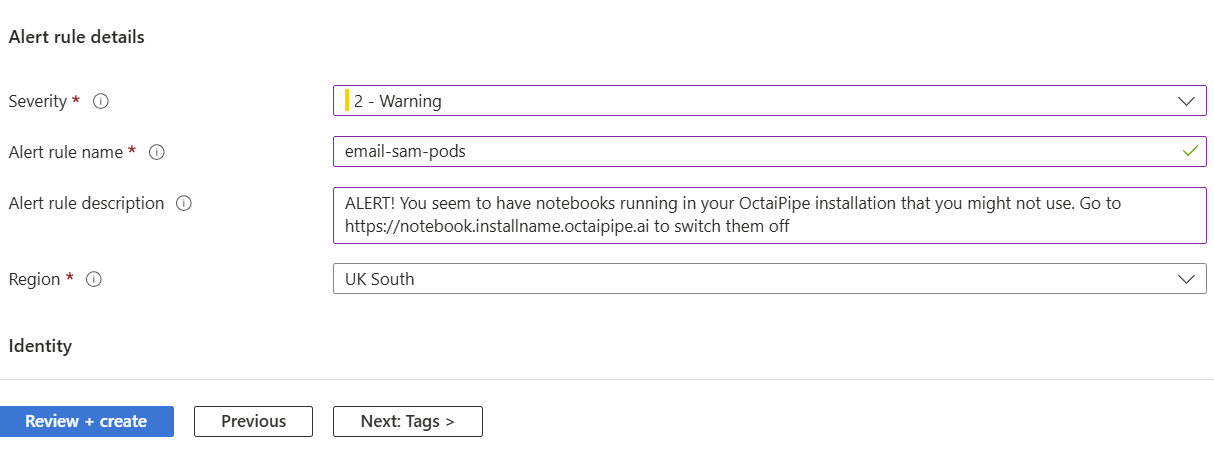
Set the alert frequency to something reasonable, e.g. every day and check that row count is more than 0, indicating that some pod has been running for more than the specified time.
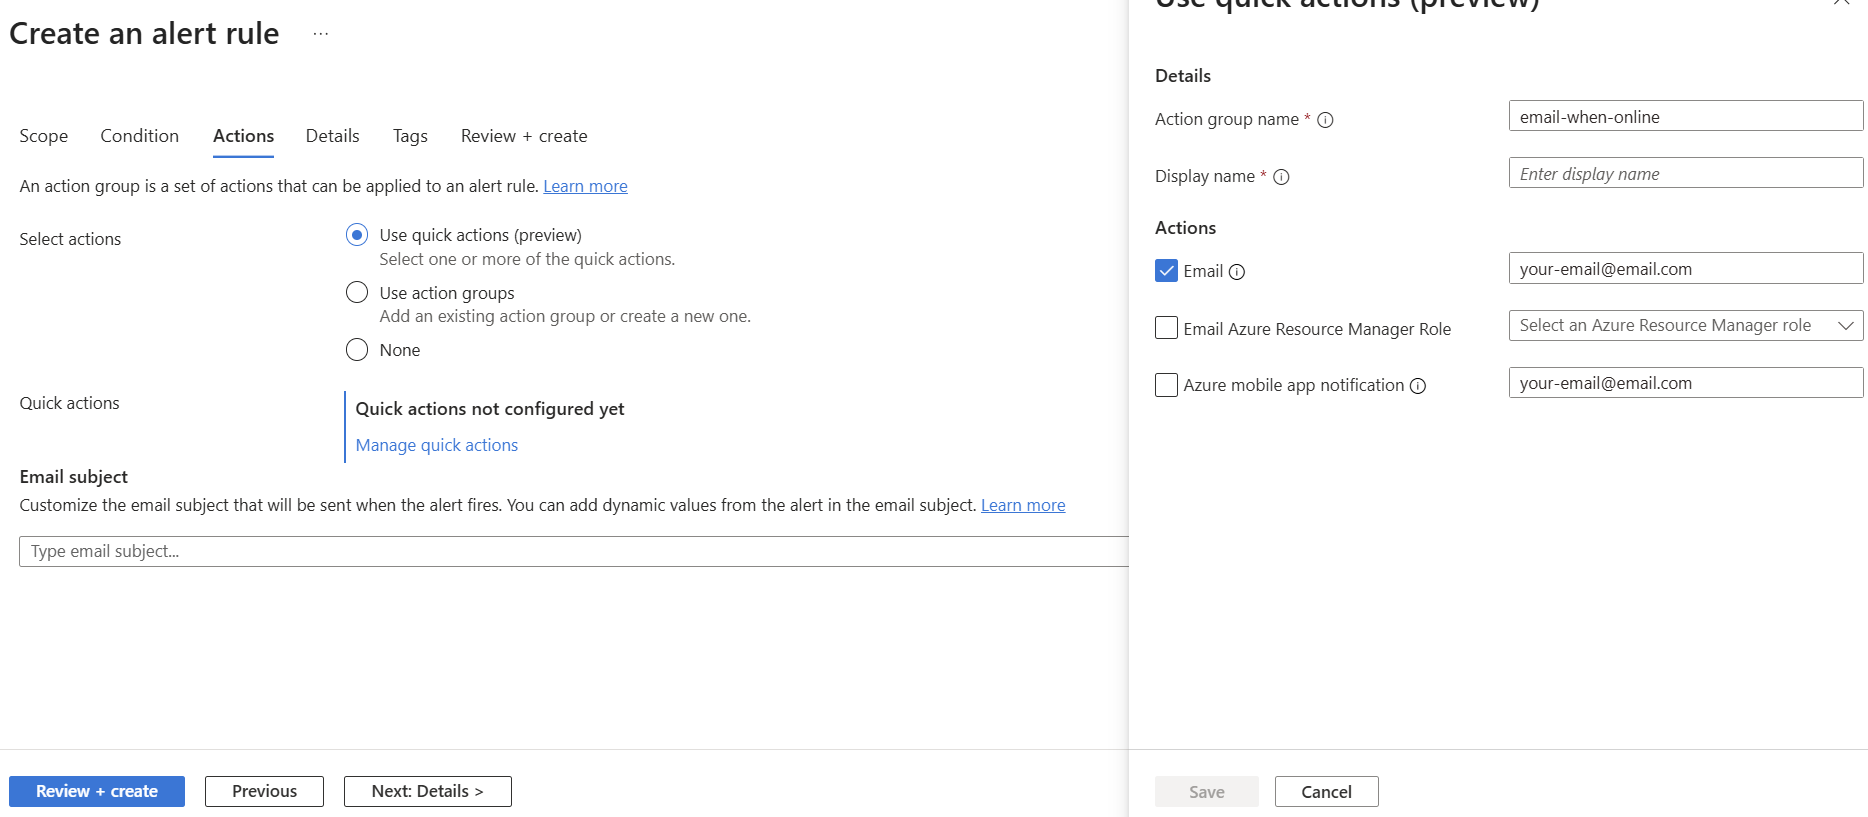
3. Set up Action Group#
Finally, set up an action group to send you an email when the alert is triggered.
You can also decide on a specific message to send, with details like where to go to stop the notebook server.