Register a Device#
Device registration is performed via OctaiPipe’s online interface:
Steps#
Login: Access the online portal using your credentials.
Navigate to Device Management:
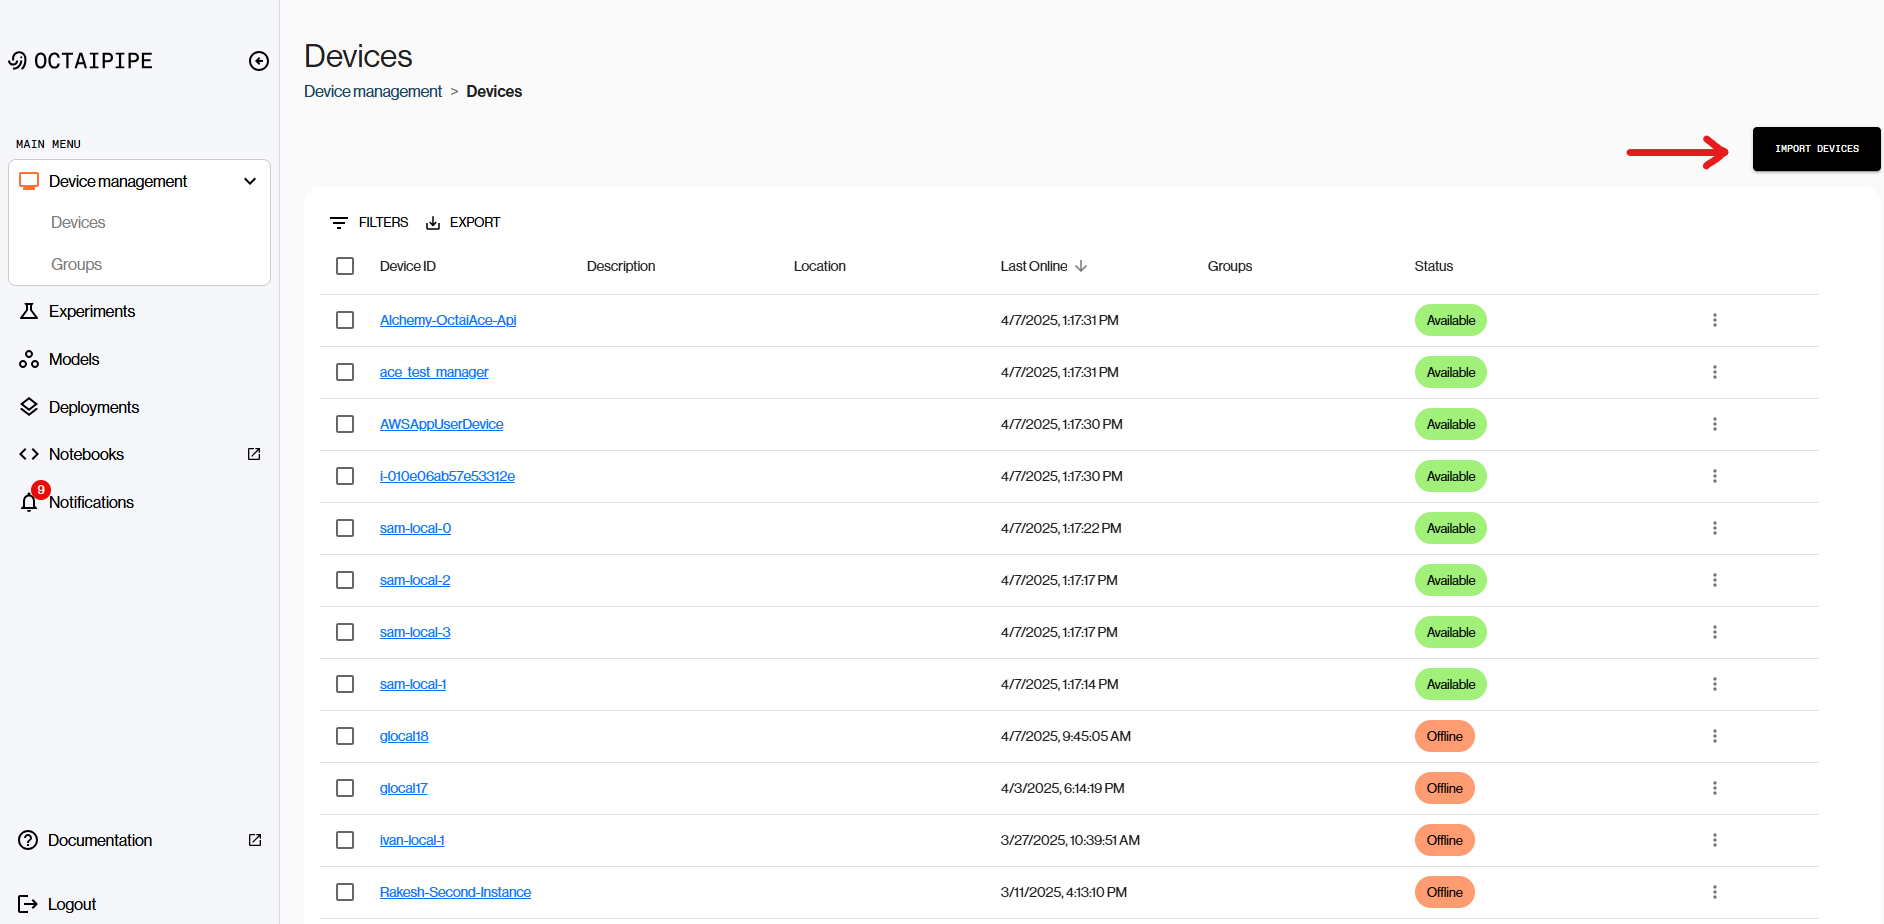
Select “Device Management” from the main menu.
Choose “Devices”.
Click on the “Import Devices” button in the top-right corner.
Import Devices:
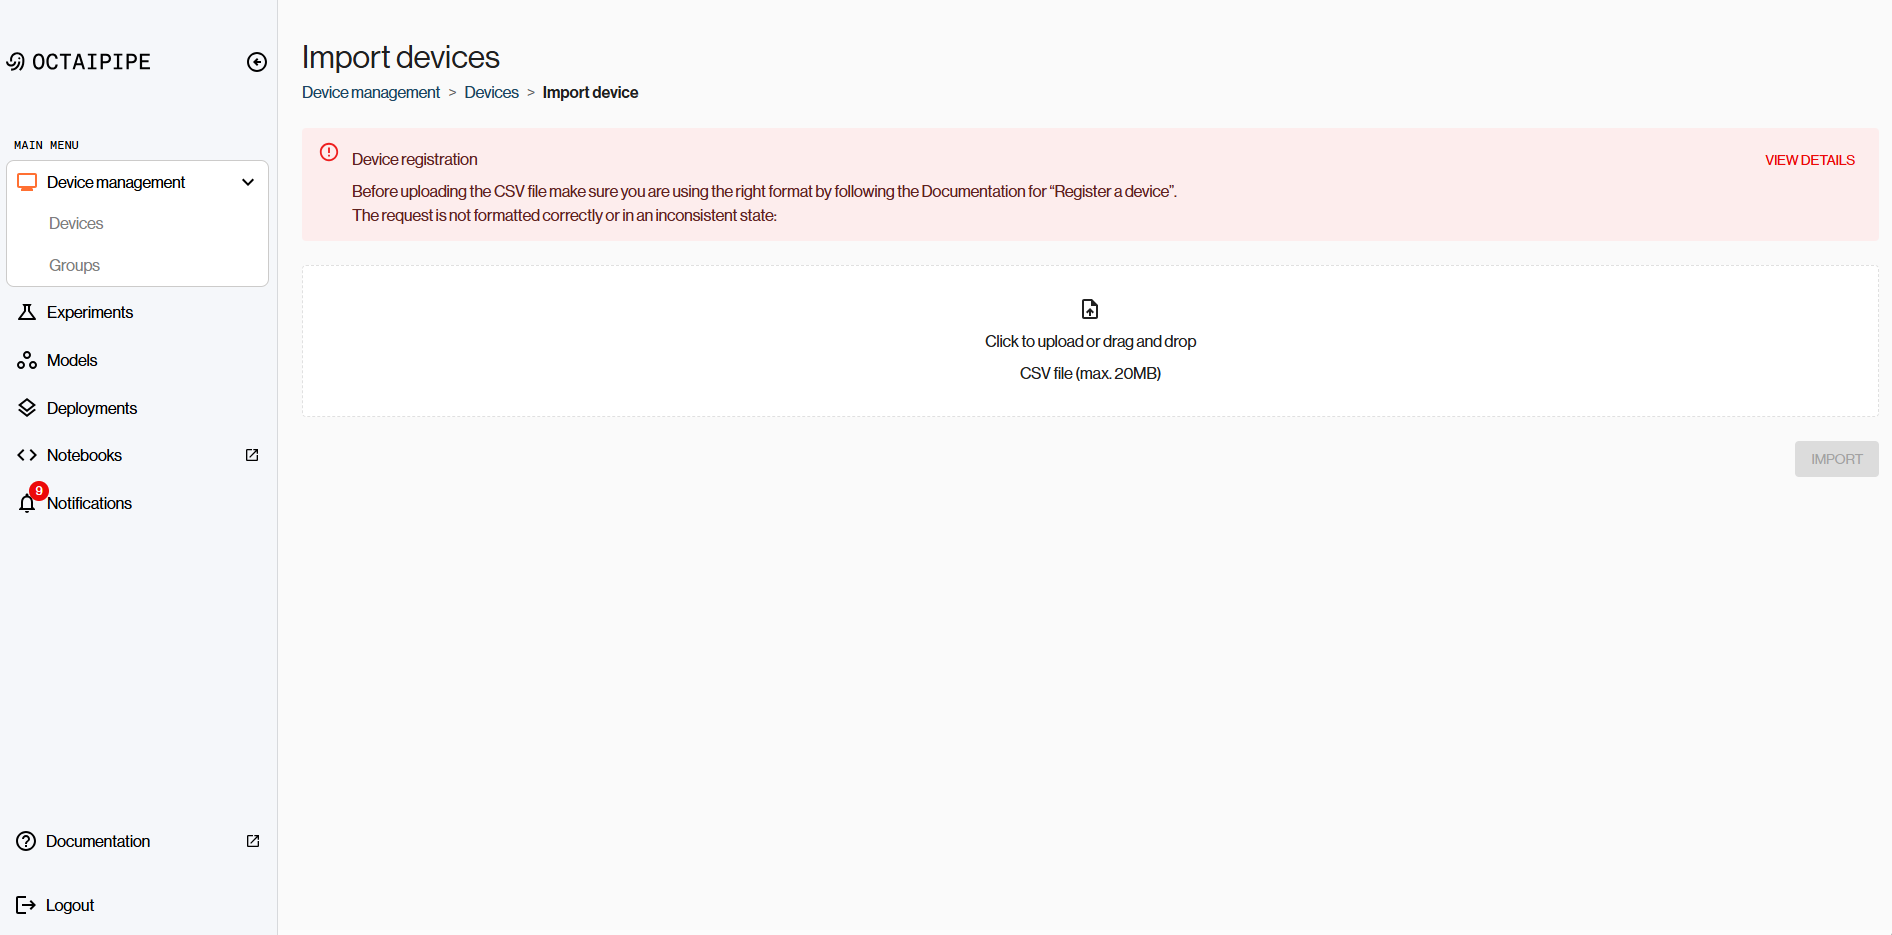
Drag your devices CSV file into the designated upload area.
Click on the “Import” button to start the registration process.
Device validation:
If any devices failed to register, an error message will be displayed.
To view errors per device, click on export to download a CSV with detailed info.
Download docker compose files:
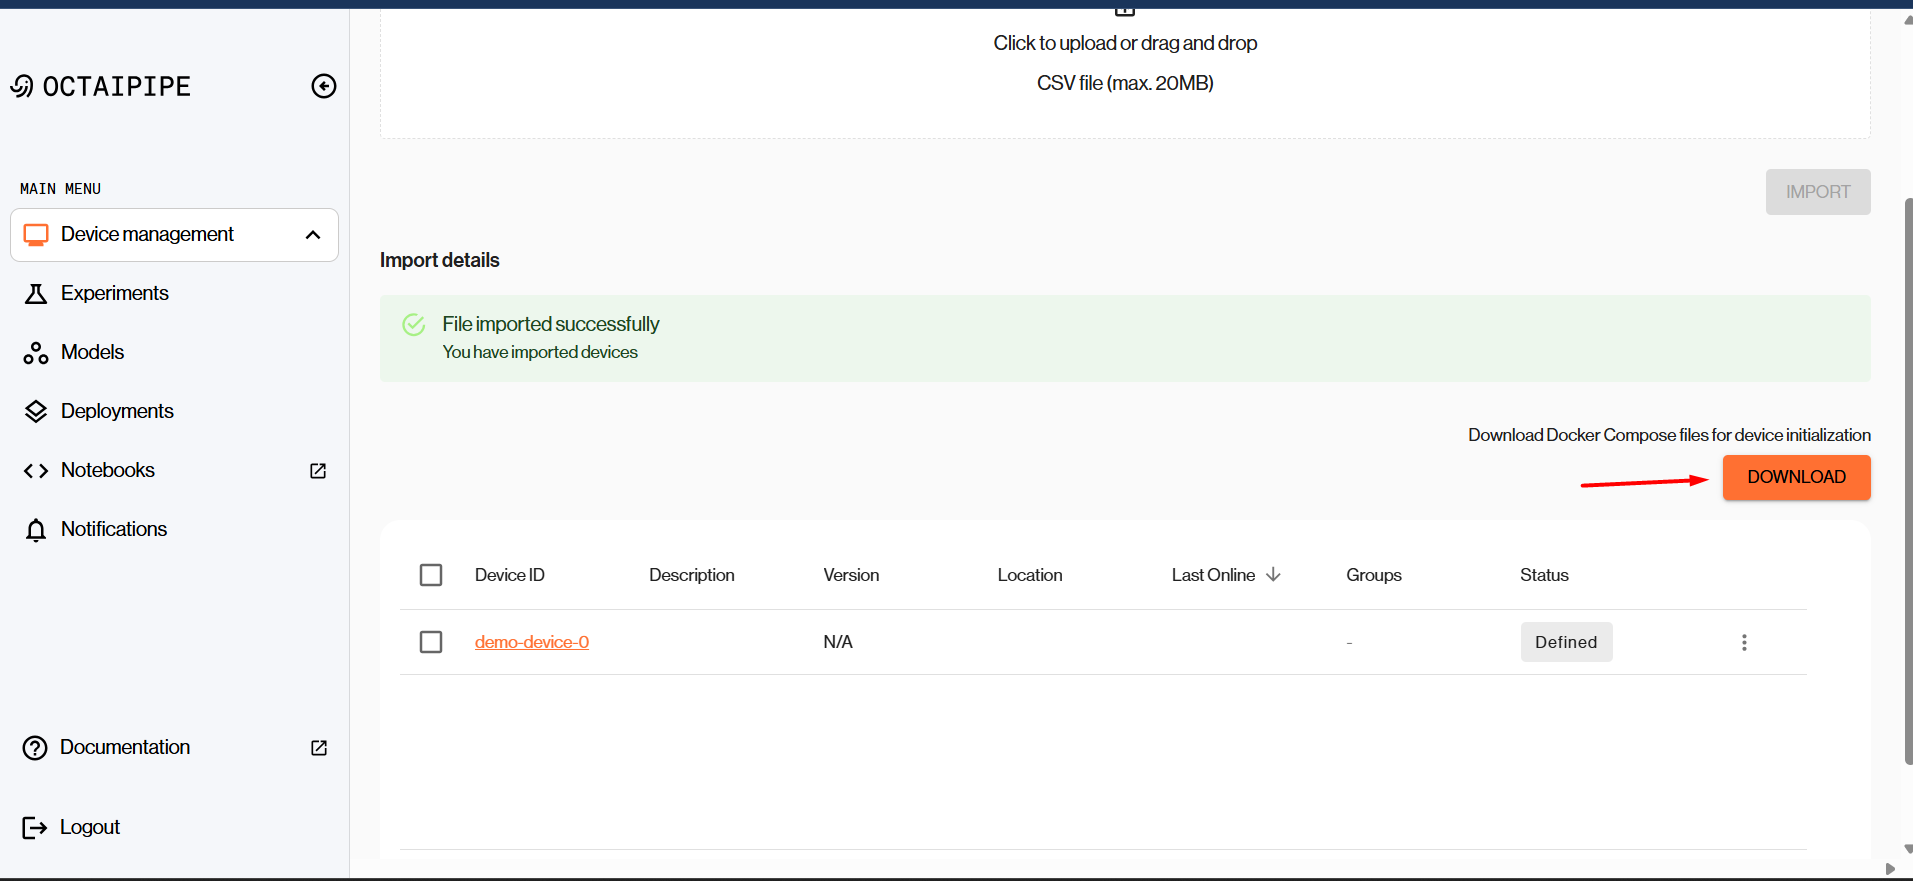
Successful device registration will generate docker compose files which provide the configuration to pull and spin up OctaiPipe Edge Client containers on your devices.
If all devices can be successfully registered, you will be provided with a zip file containing the docker compose files.
Click on the download docker compose files device initialization button.
5.1 Redownload docker compose files from the device details page:
If you did not download the docker compose files during the registration flow, or if you need to download them again later, you can access them from the device details page.
To download the docker compose files from the device details page:
Go to Device management in the main menu.
Select the device from the list to open its details page.
On the right side of the device header section, locate Download button below the “Redownload Docker Compose” label.
Click Download to download a
.zipfile containing the docker compose configuration for this device.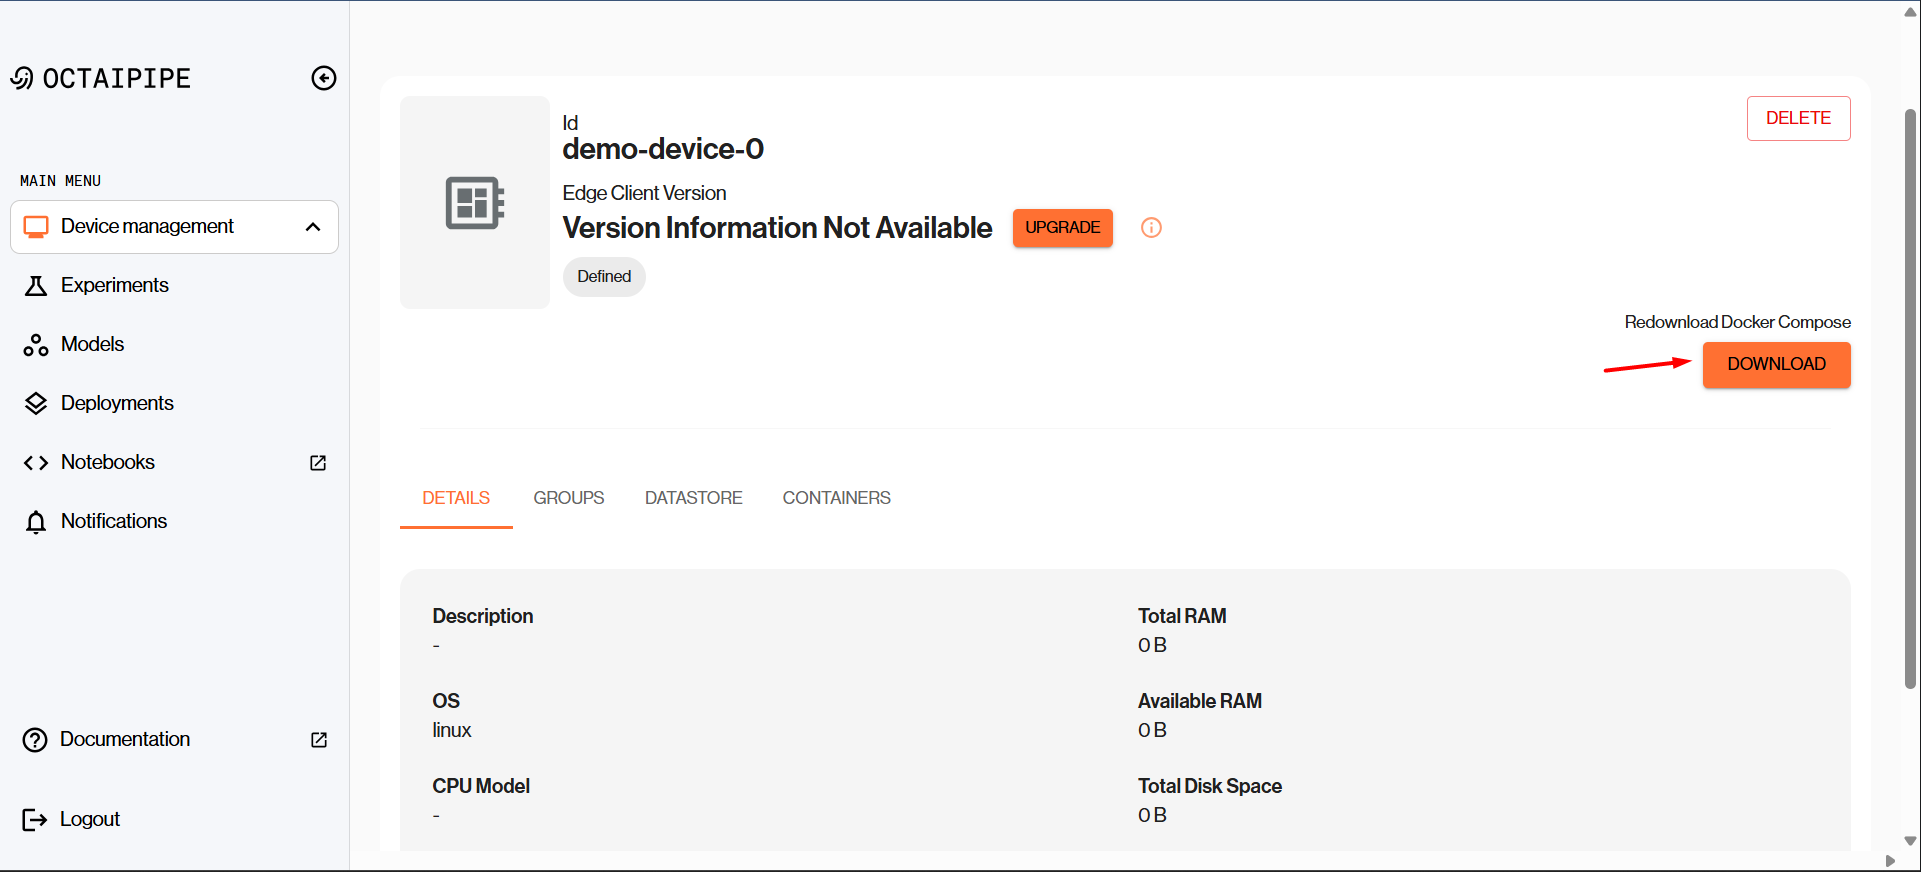
Notes:
This button can be used if you registered the device but missed the initial download in step 5.
You can also use this button at any time in the future to get the docker compose files again for the same device.
Device registration CSV format#
The device registration CSV must be formatted as follows, note that these are in camel case and case sensitive:
Field |
Description |
Notes |
|---|---|---|
|
Your unique device id, you should choose this to ensure you can identify your device |
Required |
|
Further description here can be added here. We recommend being as descriptive as possible. |
Optional |
|
Operating System of the edge device. |
Optional |
|
Hardware architecture such as AMD or ARM on this edge device. |
Optional |
|
If using InfluxDB, provide your InfluxDB URL. If one InfluxDB field is provided then all InfluxDB fields must be provided |
Optional |
|
Your InfluxDB token |
Optional |
|
Your InfluxDB org name |
Optional |
|
Your Influx org id |
Optional |
|
If usingGrafana deployed by Octaipipe, provide your URL |
Optional |
|
The total number of seconds from the devices last update until it’s status is deemed to be offline |
Optional |
Starting OctaiPipe Edge Client#
Once you have downloaded the zip file with docker compose files, transfer the docker compose file to the matching device, e.g. the file “device-1-octaipipe.yml” to device-1
You will need to set up an octaipipe user and assign it to the docker group, with correct group ID (49999). This is to limit access by the client to the filesystem of the device in order to enhance security. The following lines of code create the docker group with ID 49999, adds an octaipipe user with user ID 49999 and adds it to the docker group. newgrp docker then implements the changes and the final line gives the docker group ownership of the docker socket, enabling OctaiPipe and other docker users to use the host’s docker engine.
sudo groupmod --gid 49999 docker
sudo adduser --disabled-password --uid 49999 --gid 49999 app
sudo usermod -aG docker app
newgrp docker
sudo chown -R root:49999 /var/run/docker.sock
If the docker group does not exist (you get an error from the first line), you can instead create it with sudo groupadd -o --gid 49999 docker.
When you create the app user, it might ask you to provide details such as First and Last name. These values do not matter for OctaiPipe to function properly. You can leave them blank by just hitting enter without any input.
If you face issues running newgrp docker, you can also close and reopen your shell. This line
is not necessary to run successfully, but makes sure you get the group changes without having to
close and reopen the shell.
To ensure smooth communication between all OctaiPipe services, please create a docker network on each of your devices
as well as a docker volume. The docker volume will be named octaipipe_{your_device_id}. When
running the code below, replace {your_device_id} with the ID of each device.
sudo docker network create octaipipe
sudo docker volume create octaipipe_{your_device_id}
If you are not able to change or set up users or change permissions on your device, you can use our root images, see OctaiPipe Images. This generally not recommended as it gives wider permissions than necessary to the OctaiPipe containers and lowers overall security. If you use root images, you will need to change the mounted volume in the docker compose file from octaipipe_{your_device_id}:/home/app/.octaipipe to octaipipe_{your_device_id}:/root/.octaipipe.
NOTE: If you are running the root image rather than the octaipipe user image, you will need to remove the change-vol-ownership service, the depends-on reference to it and the line specifying the user in the downloaded docker compose files.
After creating the network and setting up the user, you are ready to start the OctaiPipe Edge Client. Run the following from the same directory containing the docker compose file:
docker compose -f {compose_file_name} up -d
In case you need to see Edge Client logs, run the following:
docker compose logs -f
Finally to stop the OctaiPipe Edge Client, run:
docker-compose -f {compose_file_name} down
Network rules#
As you connect devices to OctaiPipe, you’ll need to ensure they have access to the relevant
endpoints and on relevant ports. The exact URLs will depend on the customerName field
set up in the deployment of the platform. The following network rules need to be set up:
Rule |
Destination |
Port |
Protocol |
Reason |
Outbound |
app.{customerName}.octaipipe.ai |
443 |
HTTPS |
OctaiPipe REST API |
Outbound |
fl-server.{customerName}.octaipipe.ai |
443 |
HTTPS |
FL server for aggregating FL models |
Outbound |
octaipipe.azurecr.io |
443 |
HTTPS |
Pulling OctaiPipe workload images |
Outbound |
registry-1.docker.io |
443 |
HTTPS |
Pulling edge client images |
Outbound |
auth.docker.io |
443 |
HTTPS |
Authentication service for DockerHub |
You also need to ensure DNS resolution is allowed.
Device Groups#
Device groups can be used to organize your devices. Device groups can be created and managed in the Portal or via the Python Interface. A device group can contain multiple devices and a device can belong to multiple groups. Deleting a device group does not delete the devices within it.
To create a device group using the Portal, follow these steps:
Create a Device Group:
Navigate to the “Device management > Devices” page.
Select the desired device(s) to add to the group.
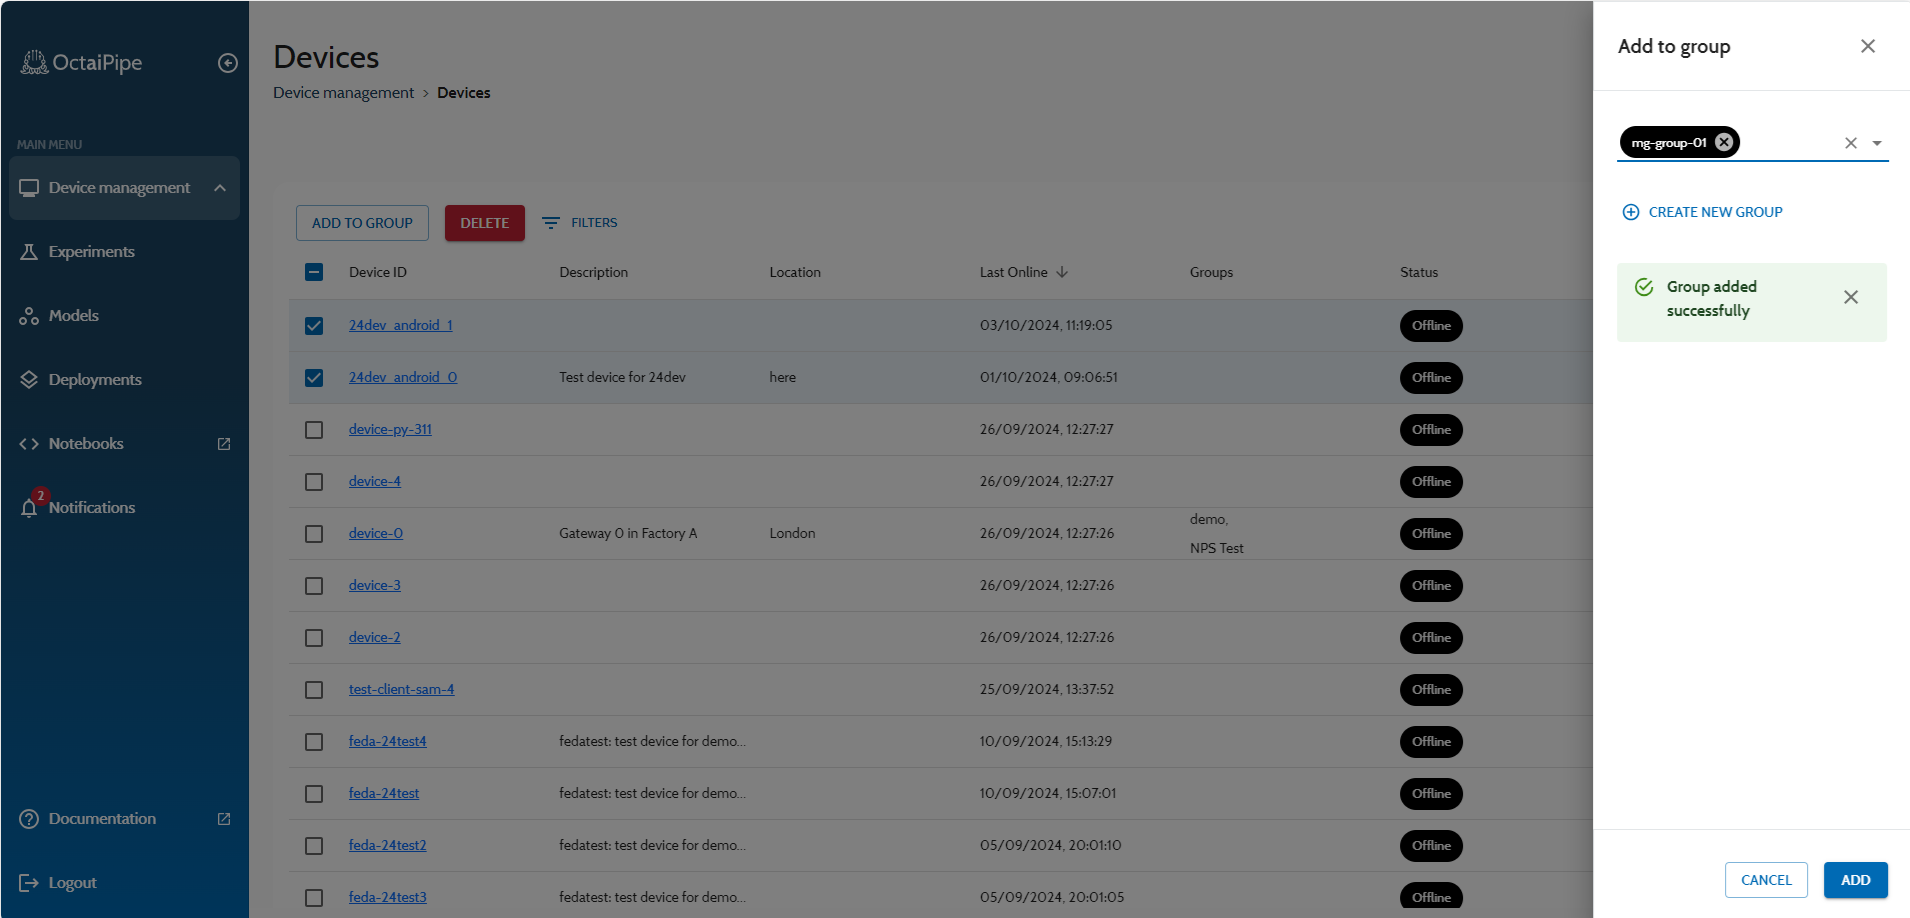
Click on the “Add to Group” button.
Click on the “Create New Group” button.
Enter a group name and optional description.
Click on the “Create” button.
Select the new group from the select list.
Click on the “Add” button.
Add a device to an existing group:
Navigate to the “Device management > Devices” page.
Select the desired device(s) to add to the group.
Click on the “Add to Group” button.
Select the desired group from the select list.
Click on the “Add” button.
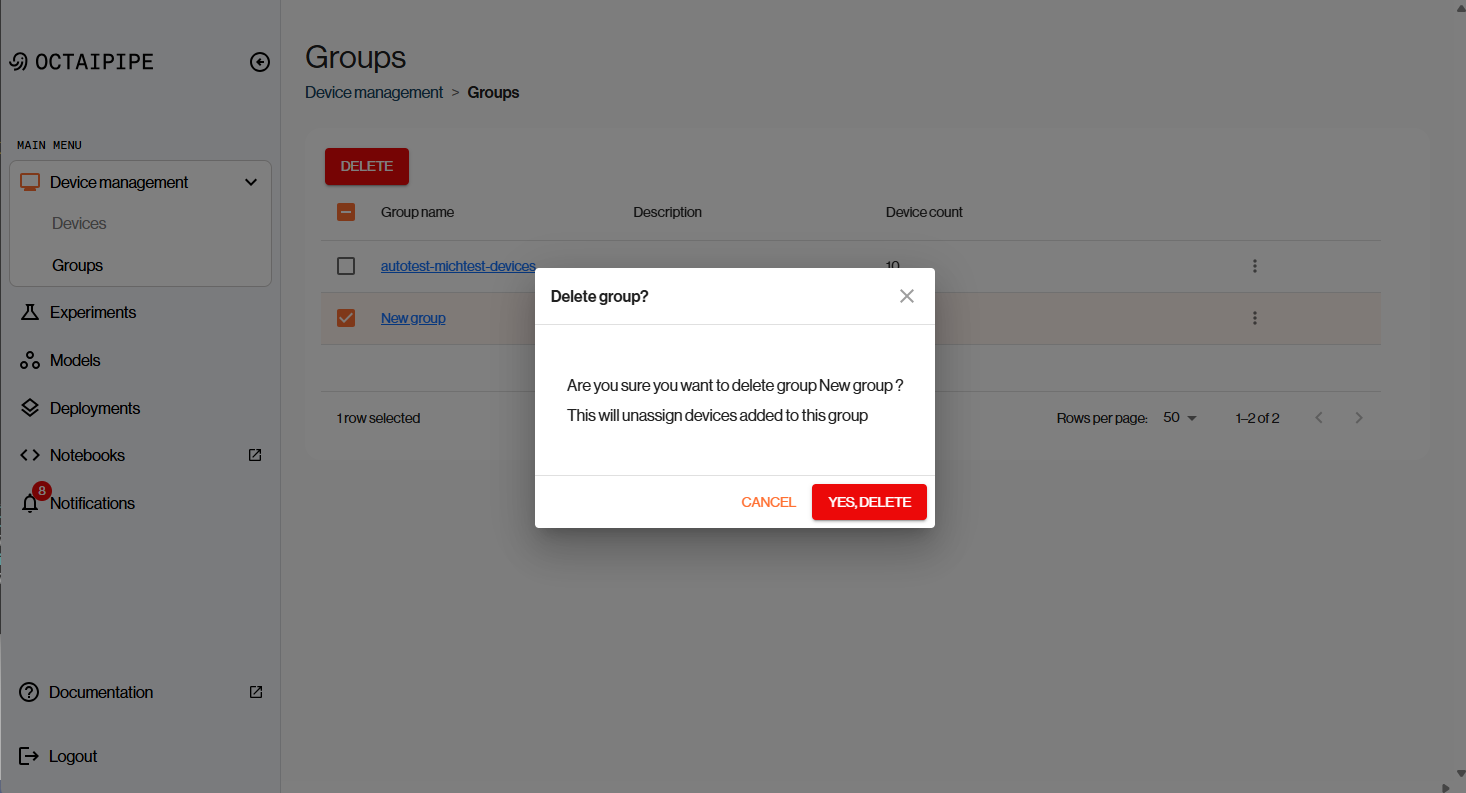
Delete a Device Group:
Navigate to the “Device management > Groups” page.
Select the desired group.
Click on the “Delete” button.
Remove a Device from a Device Group:
Navigate to the “Device management > Groups” page.
Select the desired group.
Select the desired device(s) to remove from the group.
Click on the “Remove from Group” button.
To create a device group using the Python Interface, follow these steps:
Create a Device Group:
Use the new_group function to create a new device group.
from devices import new_group

group = {
    "groupName": "example_group",
    "groupDescription": "This is an example group"
}

new_group(group)
Add a Device to a Device Group:
Use the add_device_to_group function to add a device to a group.
from devices import add_device_to_group

device_id = "device_123"
group_name = "example_group"

add_device_to_group(device_id, group_name)
Remove a Device from a Device Group:
Use the remove_device_from_group function to remove a device from a group.
from devices import remove_device_from_group

device_id = "device_123"
group_name = "example_group"

remove_device_from_group(device_id, group_name)
Delete a Device Group:
Use the delete_group function to delete a device group.
from devices import delete_group

group_name = "example_group"

delete_group(group_name)
Multiple OctaiPipe devices on one machine#
During the experimentation stage, it can sometimes be useful to try out OctaiPipe code and configs without running it on production hardware. When a limited number of devices are available outside of production, it might be useful to simulate multiple devices on a single physical device or Virtual Machine.
From OctaiPipe version 2.3 and forward, it is possible to run multiple OctaiPipe devices on a single machine. This means a single machine will run multiple OctaiPipe edge clients, each showing up as a separate device in the OctaiPipe front end. In this way, a user could for example simulate running Federated Learning on 4-5 devices, while only having access to a single physical device or VM. Note that the number of OctaiPipe devices that can be run on a single machine depends on the resources available on that machine.
To set up multiple devices on a single machine, do the following:
Register multiple devices the same way you would if they were on separate machines, following the guide above.
You will get a zip folder with multiple docker compose files.
Run the docker and device set-up for each OctaiPipe device, i.e. run the following for each OctaiPipe device
sudo docker network create octaipipe
sudo docker volume create octaipipe_{your_device_id}
Run docker compose up for each of your devices on the same machine
docker-compose -f {compose_file_name} up -d
Running
docker ps -ashould now show multiple edge clients running on the same machineYou’ll need to set up a new FL supernode for each device with unique ports (from Jupyter Notebook server)
from octaipipe import deployments

deployments.run_supernode_on_device('YOUR_DEVICE_ID', 'OP_VERSION', 'UNIQUE_PORT')

# For example
deployments.run_supernode_on_device('device_0', '3.2.2')
deployments.run_supernode_on_device('device_1', '3.2.2')
When running OctaiPipe code, such as an FL experiment, each device can now be specified as a separate device in the YAML config
Streaming Device Logs#
If you wish to debug edge workloads spun up by OctaiPipe on your devices, see our documentation for streaming device logs here.